★ Ice Cream Cone Cake! ★
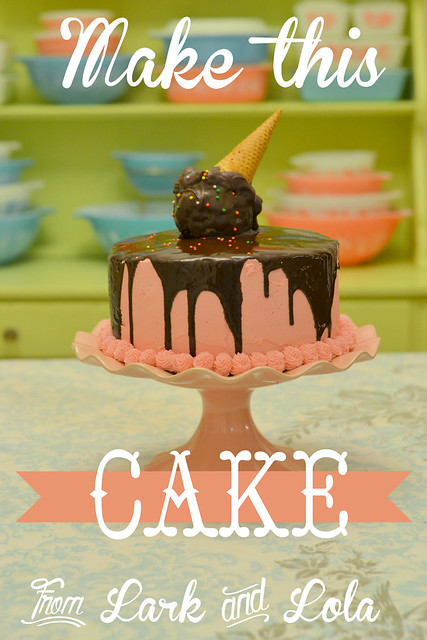
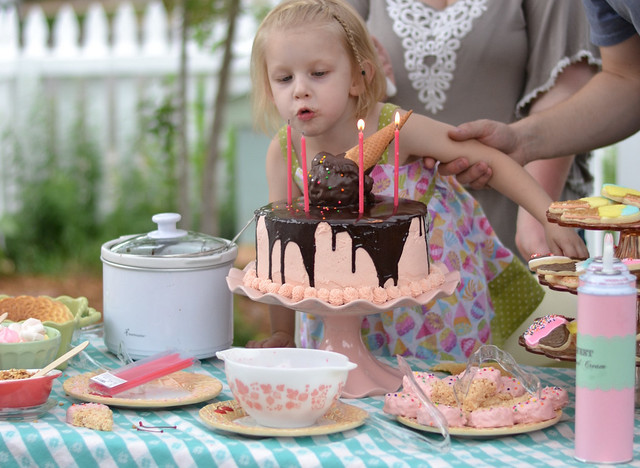
This is the cake I made last year {August 2012} for my daughter's 4th birthday party. The inspiration was found here, and I immediately loved it and decided to recreate it for her party, but they didn't include instructions. Lucky for me, I took cake decorating classes when this girl was a brand new baby--five years ago--so I was able to make it without any help.
Today, I'm sharing this tutorial with you so that you too cake make yourself an ice cream cone cake!
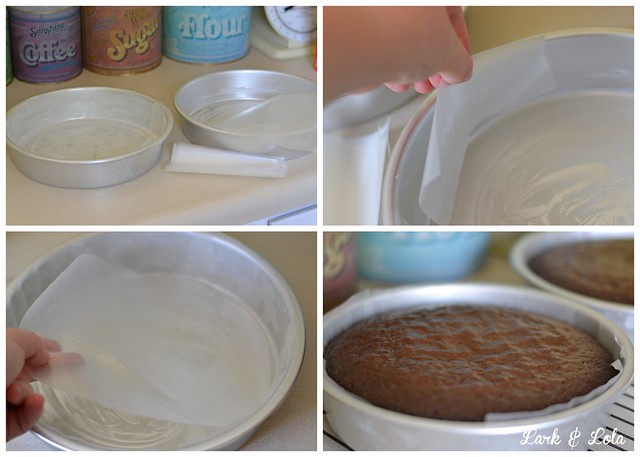
First is the prep work...
Coat two 9 inch round pans with Crisco and line completely with wax paper.
This is how we get cakes to pop right out of the pan after baking.
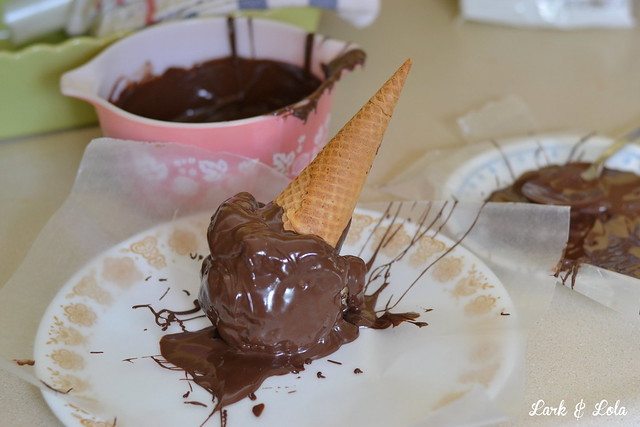
You could make the ice cream cone topper in a few different ways, but I opted to create it out of a marshmallow treat. I simply whipped up an easy batch of marshmallow treats and molded a handful into a scooped ice cream shape, attaching it to a cone before it set.
{TIP: Use toothpicks to help you keep it in place if you need to.}
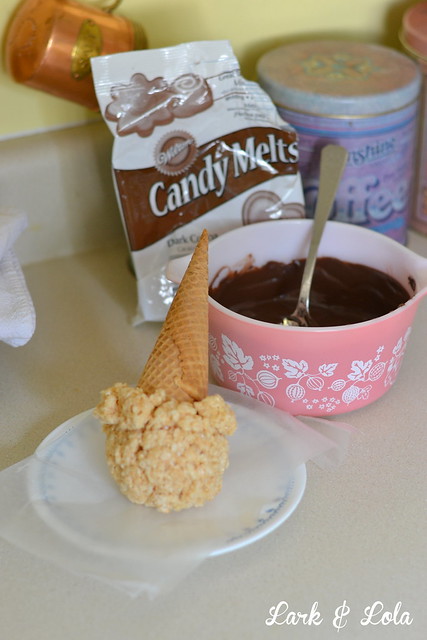
Then dip the marshmallow treat portion into melted candy making chocolate. Sprinkle the chocolate with some colorful jimmies as a cute extra detail!
{TIP: Give yourself a nice flat base and let the candy set at the angle you will want it to sit on the cake at.}
Now, I actually made this a three layer cake,
so if you want some good height, bake three layers!
so if you want some good height, bake three layers!
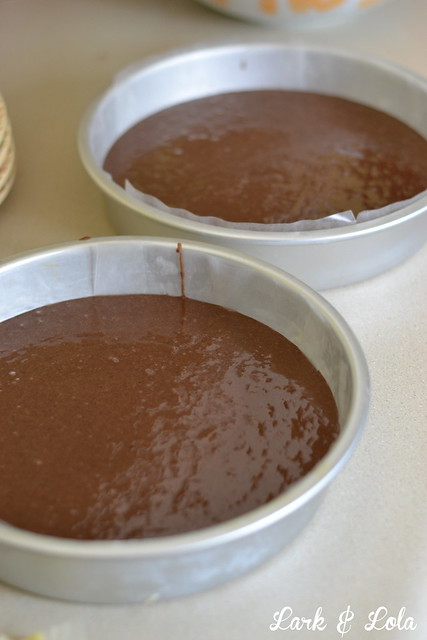
Confession: I use box mix cakes because I like the way they taste. Make scratch if you want, but I prefer the box mixed. I use any kind, but I do add a little dash of cinnamon, extra vanilla, and one extra egg per box.
I also get lots of compliments on my chocolate cakes ~ so don't be afraid to mess with that box mix!
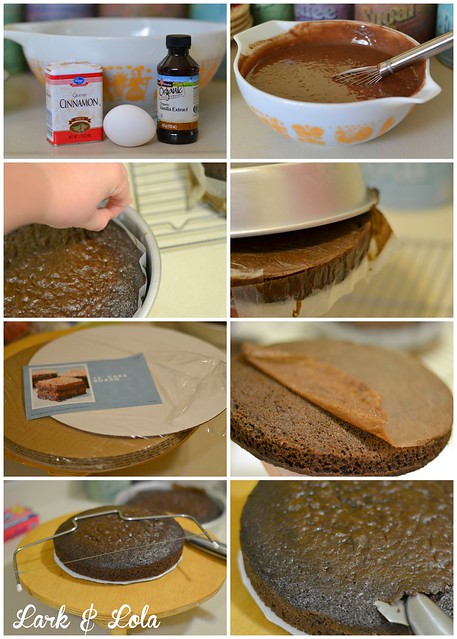
Always level off cake layers, this gives you an extra stable cake!
Baking three layers allows for you to be able to cut off the bubbled top.
Use a cake leveler, or if you don't have one,
a bread knife and a careful hand will do.
a bread knife and a careful hand will do.
Next, whip up your favorite buttercream. My favorite is Serious Cake's buttercream recipe--although she misses one important ingredient! SALT! Salt is a must for buttercream. It gives the buttercream a nice bite to it and cuts the sweetness just right. Just sprinkle in to taste, while mixing, if your recipe doesn't call for it.
{TIP: Your buttercream should not taste salty, but a well salted buttercream will have a noticeable tang and will not be sickeningly sweet.}
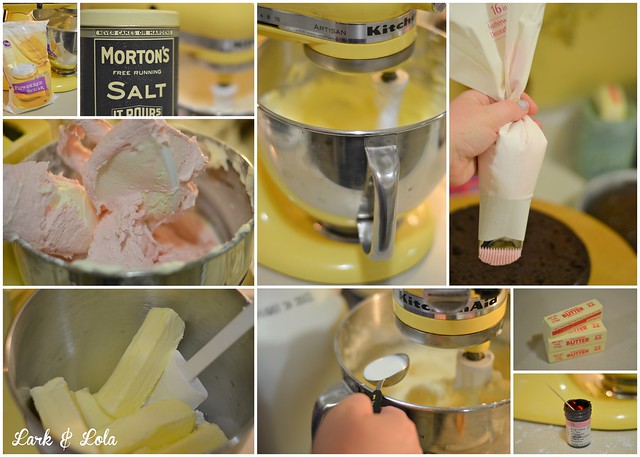
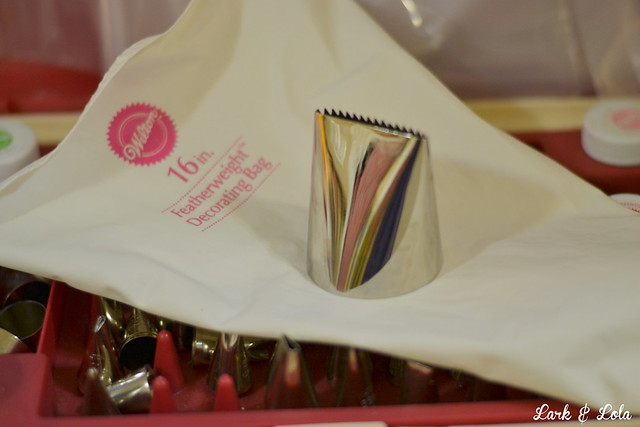
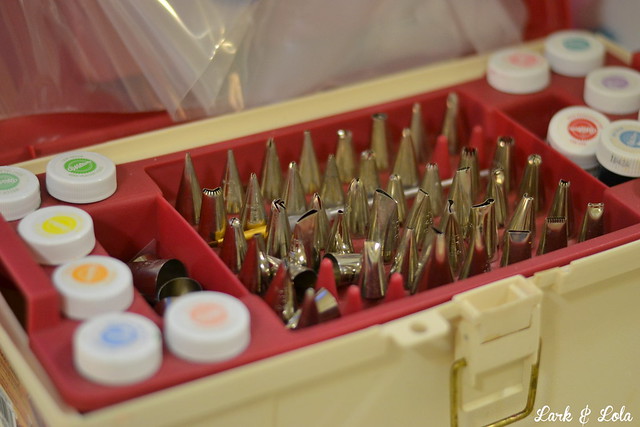
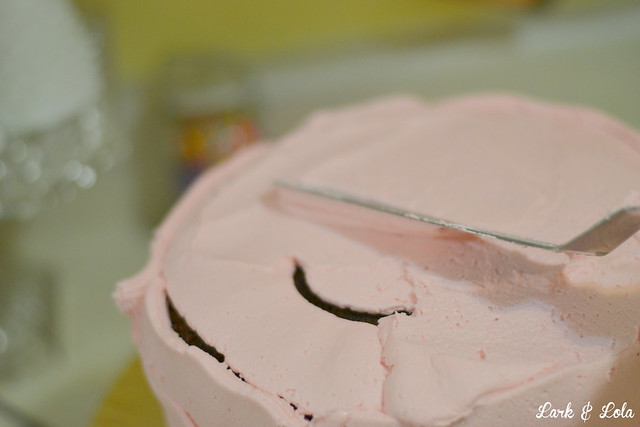
When it comes to cake decorating, this is my best friend. I call her the "Mother Tip" because, well, she's the mother of all tips as you can see! Yes, Wilton tip #789 has given me the ability to skip crumb coats. I mean it, I've never done a crumb coat.
My cake decorating tools are wonderful to have but really you don't need much to make this cake. Anyone can make this cake.
So grab a pastry bag and let's keep going!
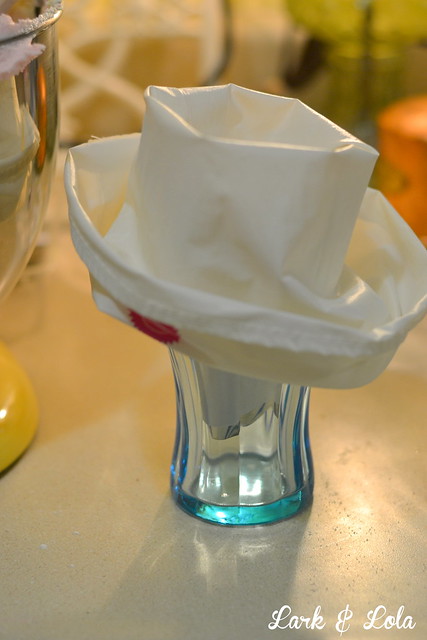
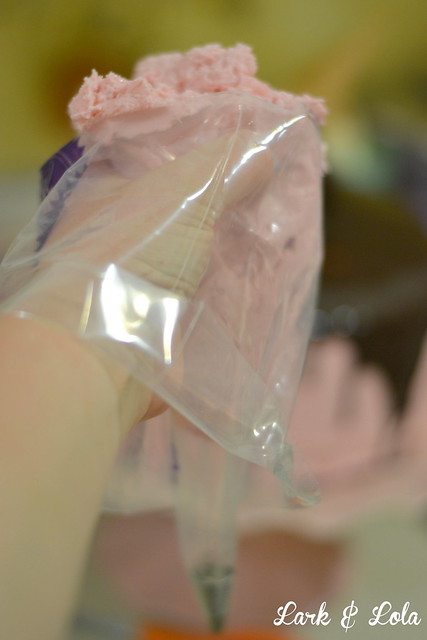
Fill your bag easily with one hand my folding it out over a cup:
Now, you could place a filling in between your layers, which would be delicious! Seedless raspberry jam or Bavarian cream would be fun. Today, however, I'm showing you how to fill your layers with buttercream.
Tip #789 allows you to do this:
Tip #789 allows you to do this:
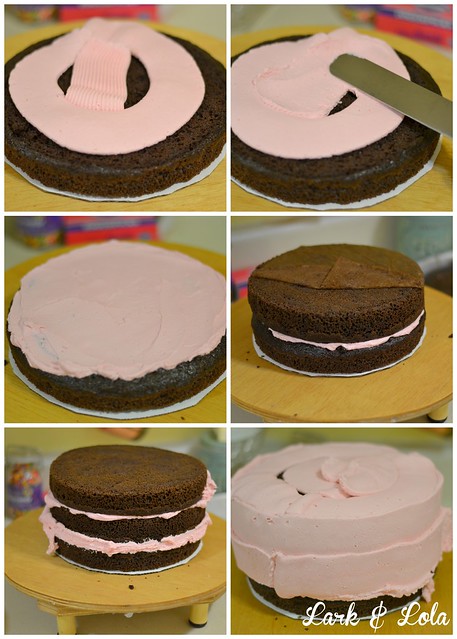
You want to build your cake on a cardboard circle.
You can cut your own or buy these pre-sized at any craft store.
You can cut your own or buy these pre-sized at any craft store.
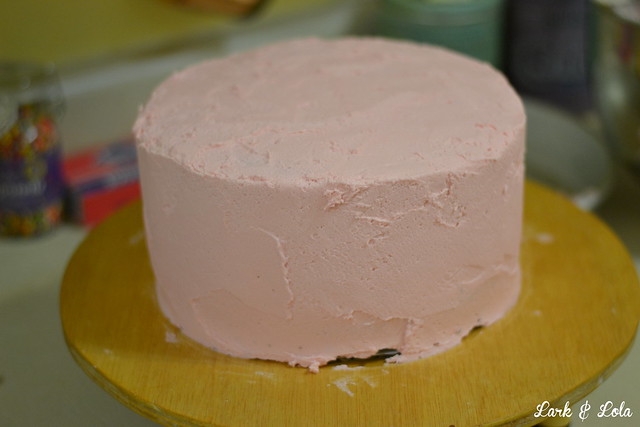
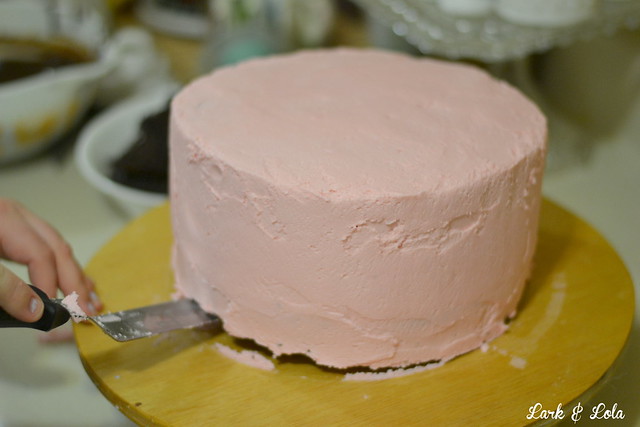
Now it's just a matter of smoothing.
{TIP: Using an offset spatula, smooth your buttercream over the cake with a nice waving motion back and forth. Do not simply lift the spatula, or your buttercream--and some cake--will come with it. Smooth back and forth, only lifting your spatula as you move sideways off the cake.}
Use your spatula to fill in any holes in your frosting job.

And finally, a bench scraper is a wonderful tool beloved by all cake decorators. You don't have to have one, but if you do, use it!
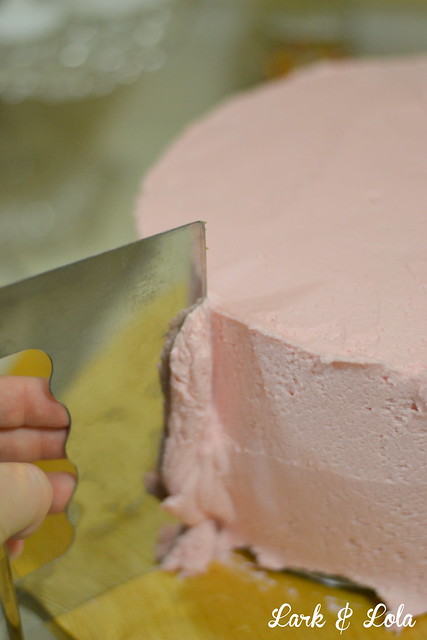
I usually try and get a cake as smooth as humanly possible by using a variety of tricks. But for this cake, I actually like that "ice box" look to it.
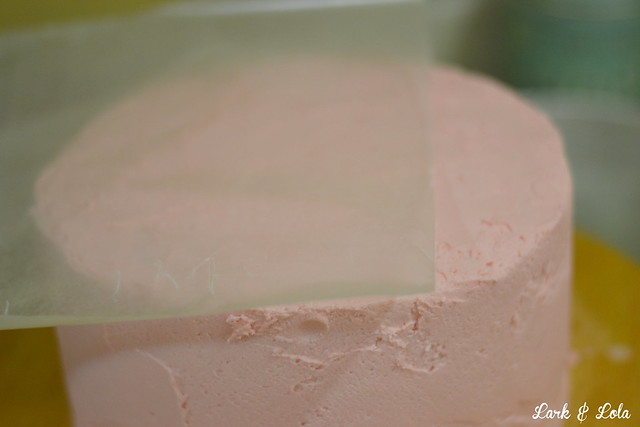
I smoothed it a tad by waiting for it to crust {as a buttercream with powdered sugar will, wait for it to become non-sticky after icing your cake--this does not work with store bought icing} and then use either wax paper OR a Viva brand paper towel to smooth your cake further. Simply place the wax paper/paper towel on the frosting and use your fingers to rub the frosting smoother.
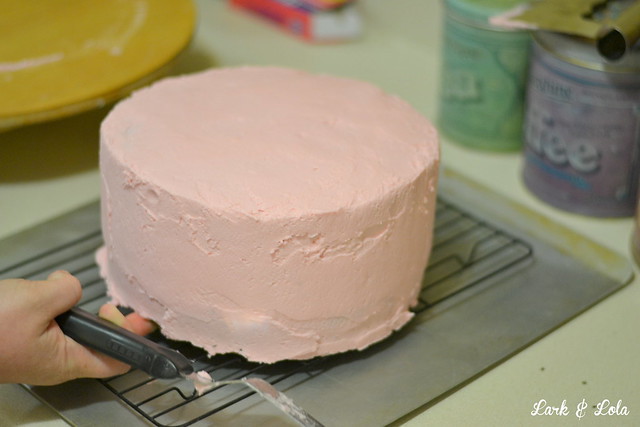
Once the cake is frosted to your desired look, lift with an offset spatula...
Carefully move the cake onto a rack over a cookie sheet.
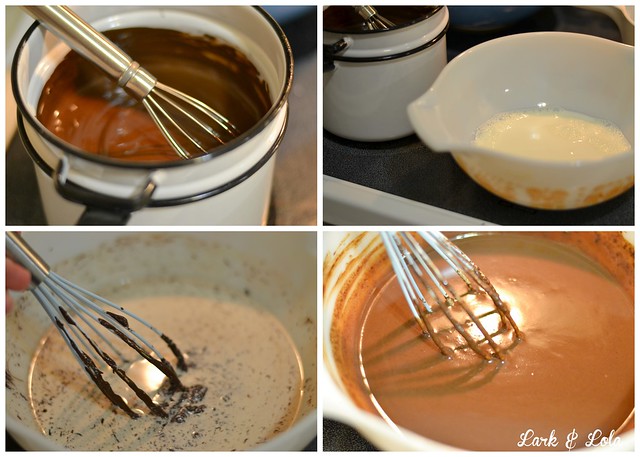
The name sounds fancy but this stuff is EASY to make. Simply a matter of heating cream and chocolate chips and whisking together. See me make ganache here, on my Boston cream pie tutorial.
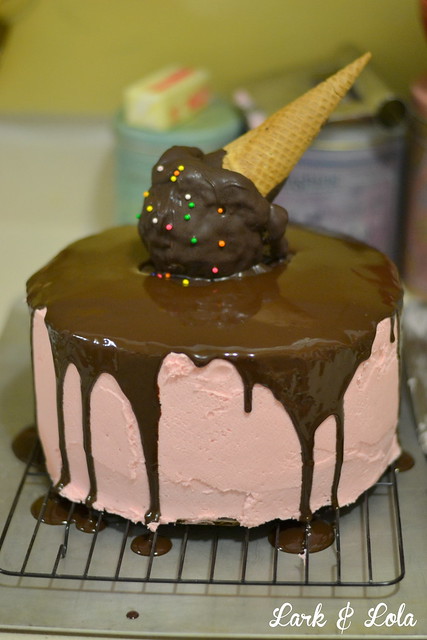
Once your ganache is cooled enough, start pouring over your cake right smack dab in the middle, allow it to spread itself. Then, once it gets to the edges and starts dripping over, you can pour a little more over to create more drips.
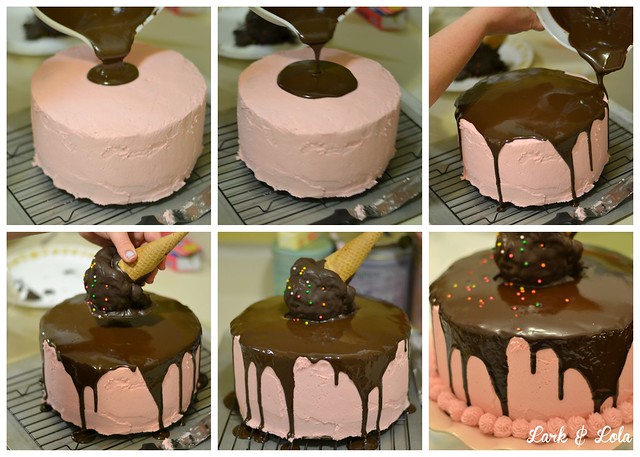
Have your ice cream topper ready to be placed, as well as some jimmies to be sprinkled over.
Again, use a toothpick or two to get that ice cream to stay in place!
{Just don't forget about it when serving.}
I recommend storing your cake in the fridge. Buttercream & cake is fine at room temperature, but the ganache will become more solid and set well in the cold.
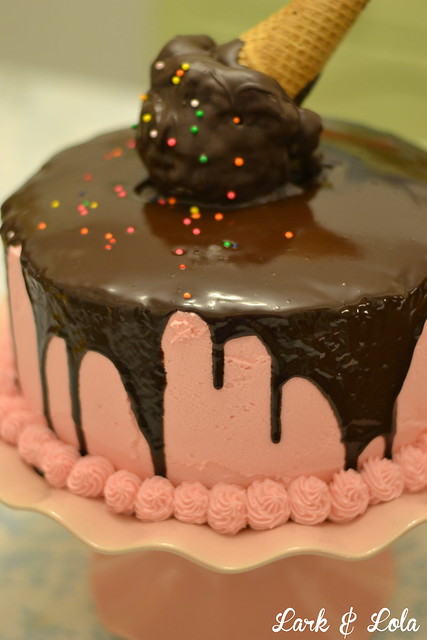
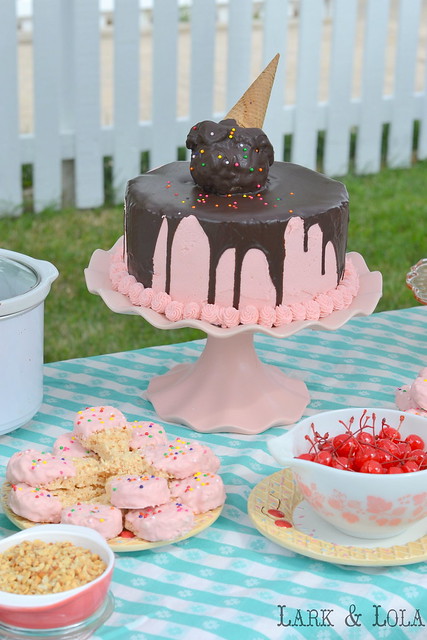
When you are ready, move the cake to a serving cake or pedestal cake stand. Then, use your remaining buttercream in a piping bag to finish it off with a nice decorative border.
There you have it!
★ Ice cream cone cake! ★
That wasn't so hard, right?
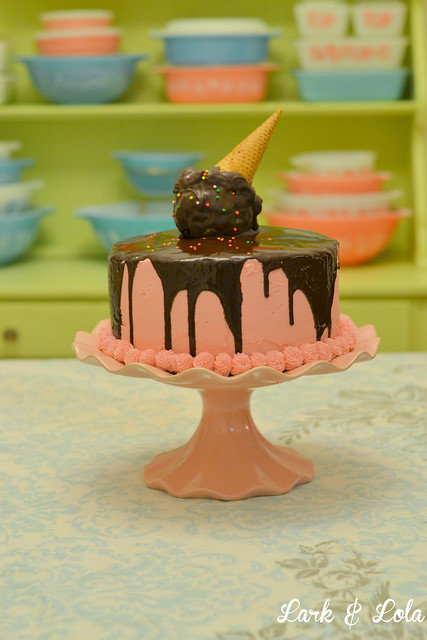
And it looks so stinkin' cute.
Perfect for any birthday or celebration.

So you heard me! Go make this cake...right now!
Cheers,
Heather


6 *´¯`* ℓσvεℓү cσммεηтs *´¯`*
Hanna & I have decided we are making this cake for my brother in law's birthday! I will let you know how it turns out :-)
ReplyDelete~Erica
That's fantastic, please do!
DeleteOh wow...it's beautiful! This could easily be tweaked a little bit and turned into a volcano for a little boys dinosaur party. So cool!
ReplyDeleteWhat a great idea! Now you have me thinking of all these different things that could be done with this cake...hmm...
DeleteThat cake is AMAZING but I'm drooling over your pipping tips and gel dye kit more so. SWOON! Where did you get it?!
ReplyDeleteXO/Lena @ Root&Blossom
Thanks so much Lena! My cake tip set is from eBay, it was a brand new huge set from Wilton, my husband bought it for me when I took up cake decorating classes. I know all the craft stores carry them too. ;-)
DeleteThanks for the lovely comment!
Lark & Lola love hearing from you!