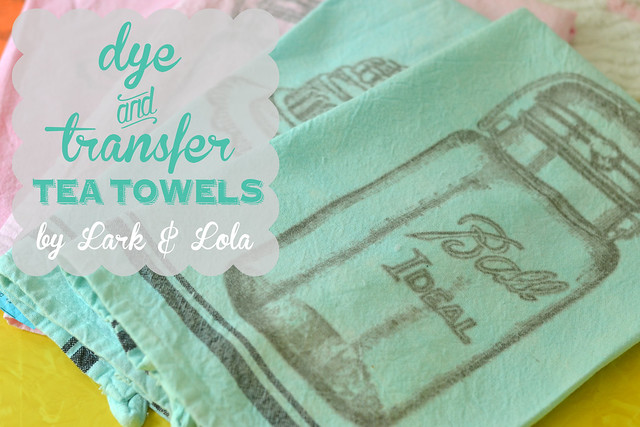
Dye & Transfer Tea Towels
I recently discovered the Citrasolv transfer method, and it is amazingly fun! My head is filled with ideas, but I first wanted to try this technique on some tea towels.

Blank tea towels can be found at Hobby Lobby and Joann's, be sure to bring a coupon if you go get some. I've found them white and plain, but some have retro stripes on them too. Aunt Martha's is my favorite brand. This pack of three cost about $6 after using a coupon.
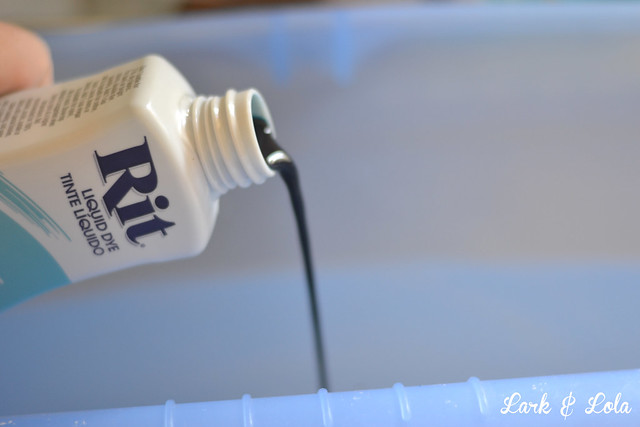
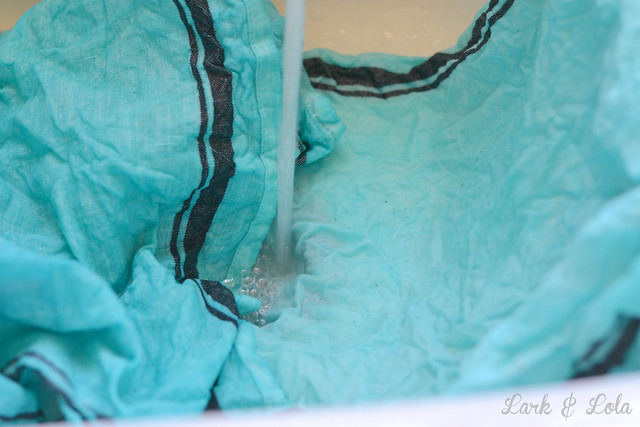
So I took them home and worked up some Rit dye solution, following their instructions {man, Rit dye is serious stuff, be careful with it}. It's also helpful to pre-wash your tea towels, as the dye will take more evenly to them.
There are different methods to using Rit dye. I used a bucket and hot water, plus half a bottle of liquid dye and some salt. Don't let Rit dye intimidate you! It's fun stuff when used properly, so just follow the directions that are best for your needs.
So after dying and washing according to the Rit dye directions, I moved onto the Citrasolv transferring.

Citrasolv is a concentrate cleaning solution found in natural grocery stores. I found mine at Vitamin Cottage, but visit their website to find a location near you that carries Citrasolv. This small bottle will last FOR.EV.ER. and it was about $7.
{Citrasolv even has a place on their website for crafters; they know their product is used in art projects. What they do with Citrasolv & old National Geographic magazines? Trippy.}
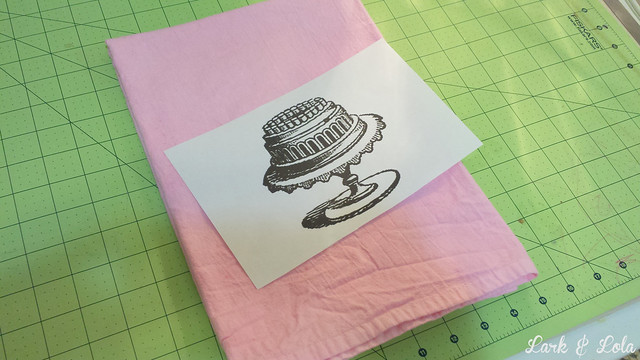
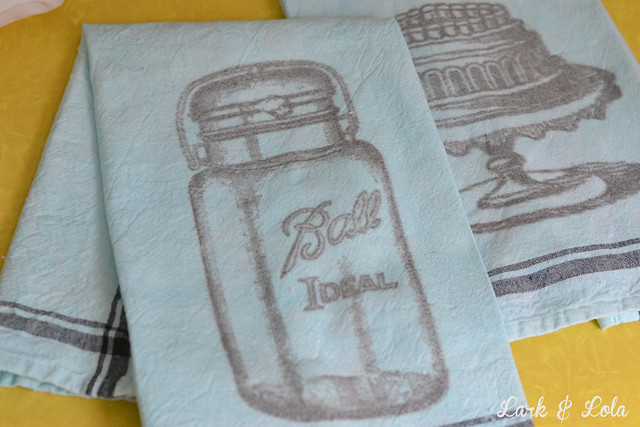
The next thing you need is a transfer image. {I found my cake, Ball jar, and Halloween image all at the Graphics Fairy!} Note: This method only works with black printed images!
The good news is you can get your image yourself; the bad news is you need a laser/toner printer. This means your average household inkjet won't do. You need an image printed, in reverse, with toner.
According to my research and experience, different copiers & printers that use toner will behave differently. For example, a store copier machine transfer didn't work for me at all--not even a speck of my image transferred. However, my husband's laser printer worked beautifully. So my advice: try out different copiers/laser printers to start, figure out which one works best, and go with that.
Finally, my last tip: my husband's laser printer always worked, but at first the image was washing out almost completely when laundered. Very frustrating. So, then he tried changing the print settings from "glossy" to "standard" printing, and voilà! So you might also have to play around with printer settings on your computer. This can be a fussy project in that respect, but once you figure it out, it's fun and the possibilities are endless!
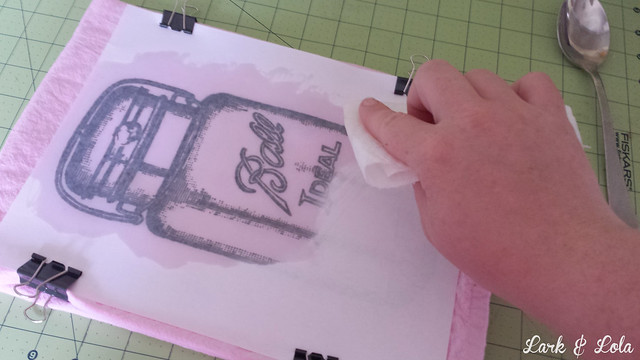
After securing my transfer image to my towel with binder clips, I used a paper towel to lightly apply Citrasolv. You want to fully moisten the entire image, but don't use too much Citrasolv or your image can bleed.
Next, I burnished the image, pressing hard with the back of a spoon. You want to work quickly because the Citrasolv seems to dry very quickly.
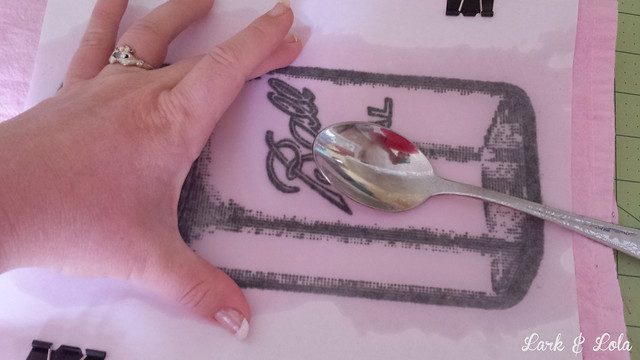
Go over the whole image, rubbing very hard.
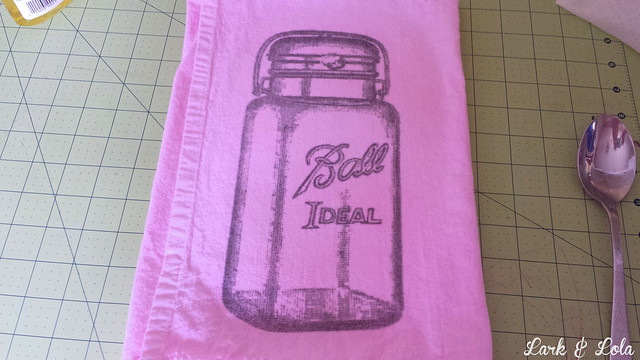
When you're sure you've gotten the entire image, carefully peek under and see how well it's transfered. If you can place it back down without moving it, you can touch up spots that haven't transfered as dark. Add more Citrasolv before more rubbing in more spots, if needed.

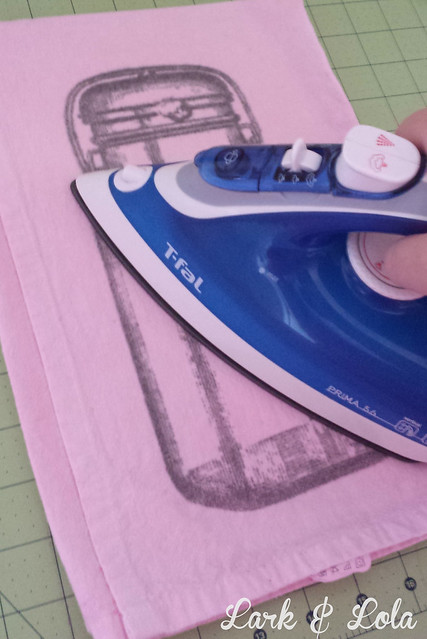
Finally, since toner reacts to heat, one last step I took was to iron over the image. This dries up the paper, and you want to do this in a well-ventilated area with an iron that you use for crafting. I have a special iron that I don't use on our clothes, so do this at your own risk & discretion. You could skip this altogether if you like; it was just an extra precaution that I think might have helped "set" the image.

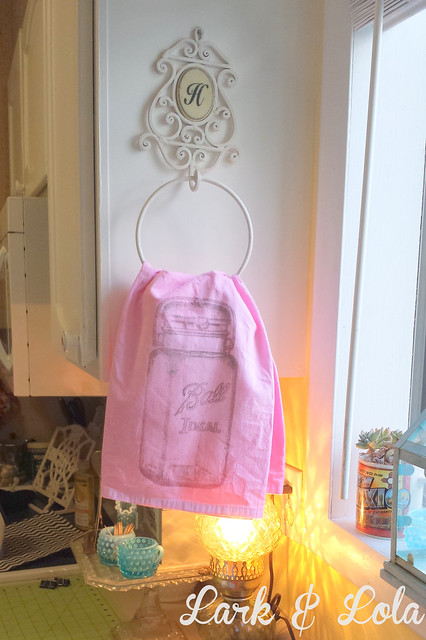
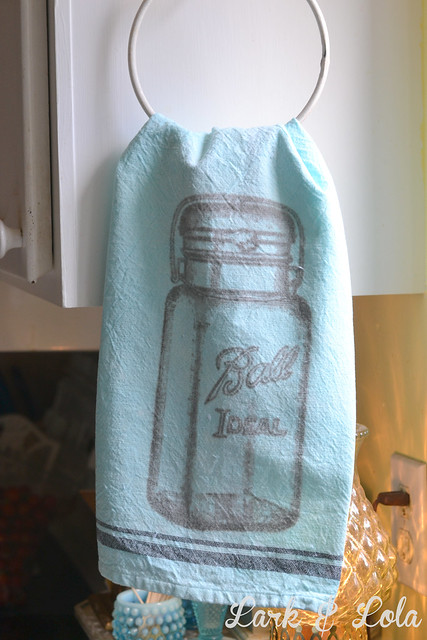
Stand back and admire your new tea towel!
Okay, maybe a little more ironing that image in...
Next, you want to wash your towel to get the Citrasolv out and check that your image is going to stick around. Just wash using mild detergent.
Here is an example of what the different printing settings resulted in after the first washing.
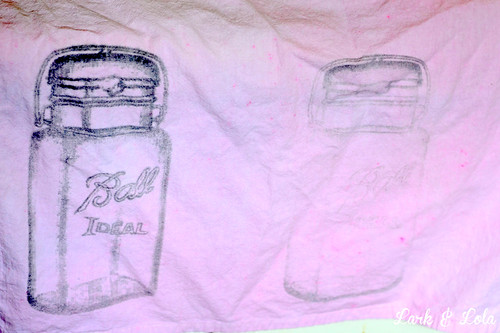
On the right is the transfer when my husband's printer was set to glossy printing,;on the left is after he changed it to standard print settings. This is to show you how even printer settings can yield such drastically different results!
Once you get your toner transfer images together, this is such a simple and cute project. These would be awesome Christmas gifts or hostess treats.
Or make some for yourself to enjoy using in the kitchen. They can be dyed any color, and the Graphic's Fairy website helps us find an endless supply of black and white transferable images.

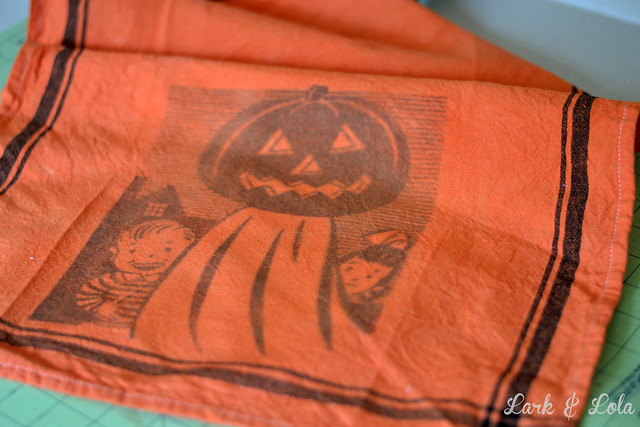
I love how cute the Halloween towel turned out with it's black stripes and pumpkin head image!
They just look so pretty hanging out in my kitchen too--they make me happy.

Let's get a closer look...
Admit it, you totally want to try this project now, don't you?
Well, get going then!

Thanks for stopping by today!
Cheers,
Heather


7 *´¯`* ℓσvεℓү cσммεηтs *´¯`*
OH MY WORD. I love this!
ReplyDeleteRight?! You should make some for Christmas gifts. You could even employ the help of your sweet daughter to assist you ;-)
DeleteThanks for visiting my blog, Tricia! I love reading yours since discovering it.
These are super cute!!
ReplyDeleteEmily
eageremily.blogspot.com
Thank you! Hope you try some for yourself ;-)
DeleteThis is amazing! I want to go out and buy a new printer RIGHT NOW!
ReplyDeleteXO/Lena @ Root&Blossom
How cool! They turned out so well. I can't believe I didn't see this before.
ReplyDeleteI'm going to have to get my mom to print some pictures on her office printer so I can try this out.
Love, Love, Love these !!! Thanks for the tutorial :)
ReplyDeleteLark & Lola love hearing from you!