Last night I took on a challenging project that I really wasn't sure I could pull off. I still consider myself quite a beginner when i...
Last night I took on a challenging project that I really wasn't sure I could pull off. I still consider myself quite a beginner when it comes to sewing, though after completing this project, I'm going to move myself up a notch, I think.
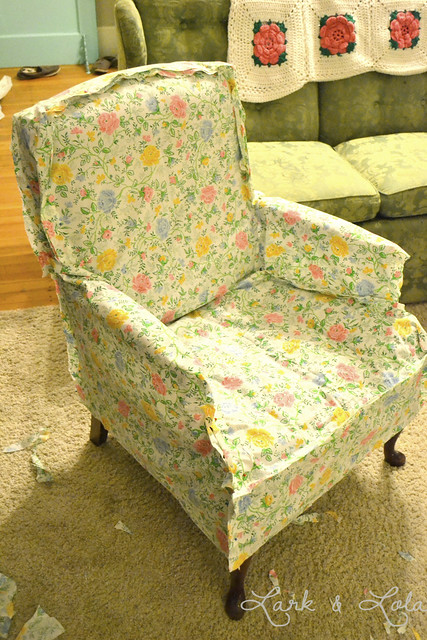
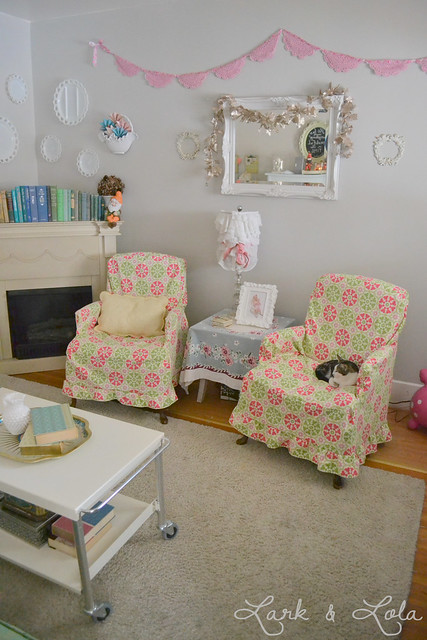
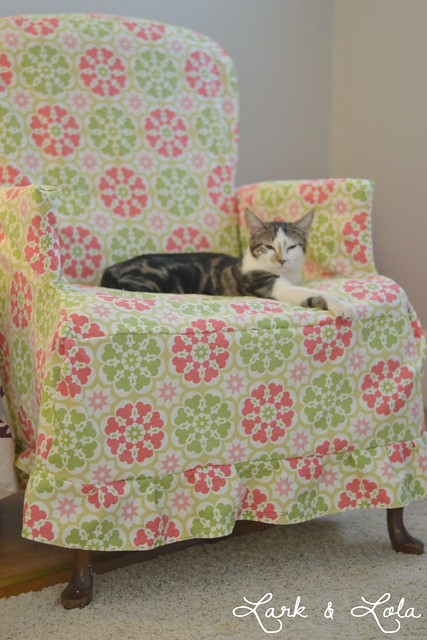
I made a slipcover! Two, actually!
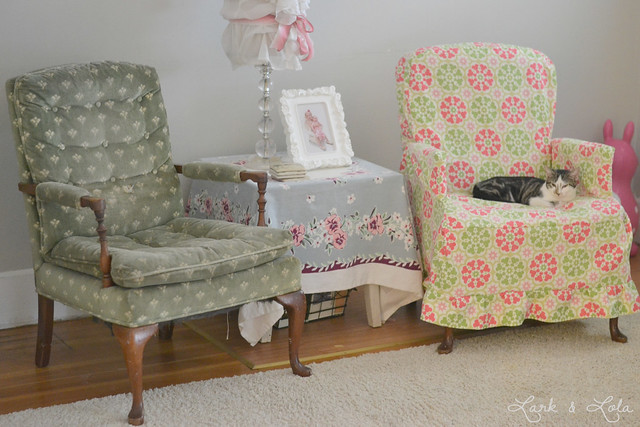
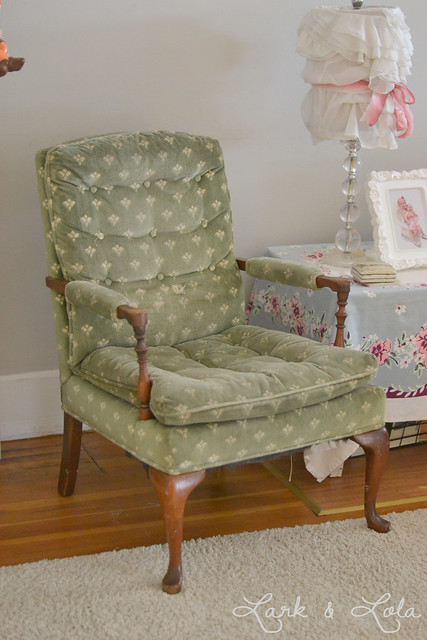
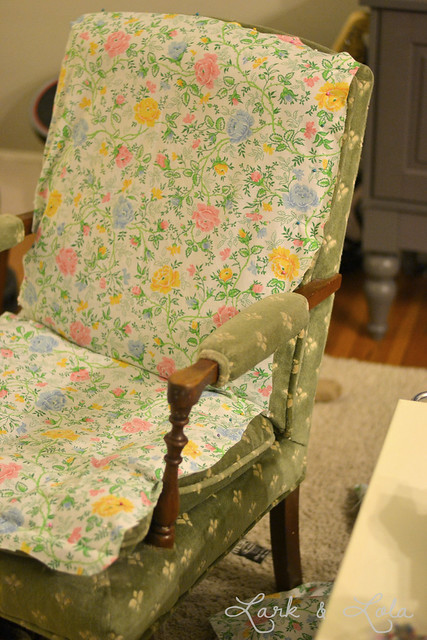
These green chairs belonged to my grandparents, I'm pretty sure they had them since the 1960s or something. Unlike most of today's furniture, these things were built to last. They're old, but comfy and have great bones. They're dirty after decades of use, despite my use of our upholstery cleaner and scrubbing at them. I do love them, I want to keep them, but they needed a makeover. So, I decided to try and create some slipcovers.
I'm so glad I tried.
This isn't a step-by-step tutorial, unfortunately. Consider this post more of an encouragement post. If you came here looking for tutorials on how to sew slipcovers, sadly I cannot offer you exact directions or send you to a blog that does--I looked high and low for an exact tutorial. The only thing I found were ebook instructions, which might be helpful to you, but I just wasn't willing to pay for them.
The slipcover fabric already cost enough...I guess I'm a cheapo.
But I'm happy to show you what
I did and also encourage you to try this! If I did it, you can too.
I bought 6 yards of home decor fabric at Joann Fabrics. You might know, that stuff isn't cheap. It was 50% off, but still, cutting up 6 yards and no pattern was a risk. I spent a good deal of my February spending money, but in hindsight I can say it was well worth it.
To cover my two armchairs, I bought 6 yards and
I was sure to pre-wash! I HATE pre-washing fabrics, mostly because I'm so horribly impatient. It's my worst character flaw, my impatience. But if you choose to take on a project like this, you really must pre-wash. The whole point of these slipcovers is to be able to remove them and wash them, so you can't have them shrinking after they're sewn, right?
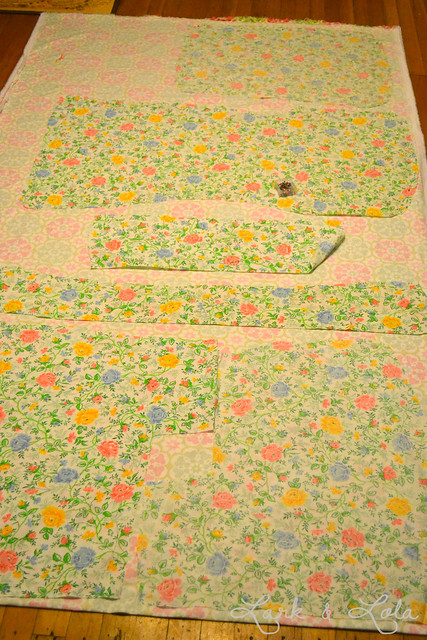
I started by creating a sort of pattern of my own. This is why I cannot give step by step instructions, every chair is different (well, that and this was my first go at a slipcover, I'm no pro). But luckily, it worked quite nicely to make a pattern this way. My chairs don't have lots of curves to them either, I think this helped.
{And ick, pardon all my cell phone pictures.}
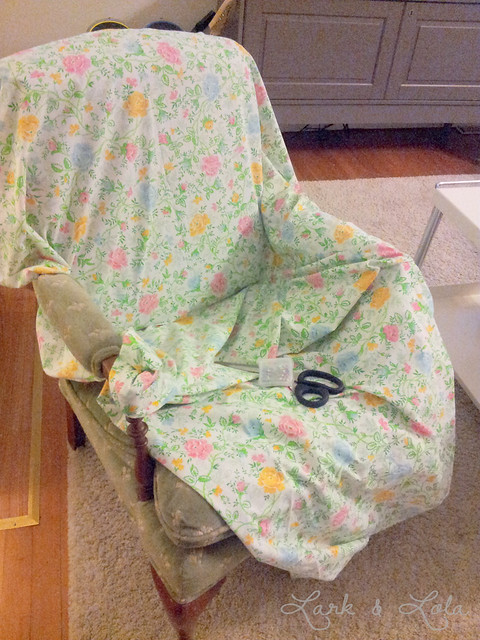
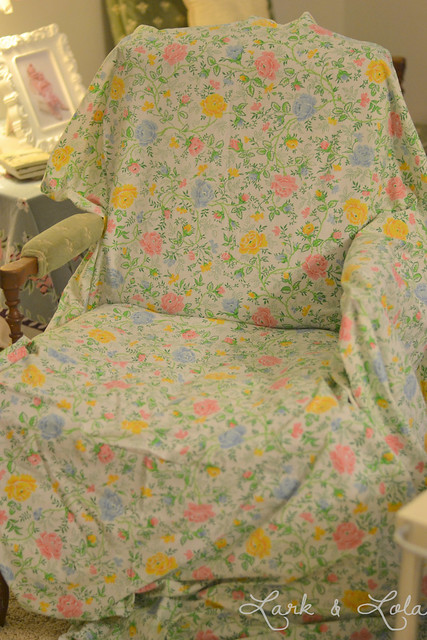
I grabbed an old sheet that I was willing to cut up, a pair of scissors, and plenty of pins. Then I draped my sheet over the chair, and started creating shapes of the pieces I'd need to make the slipcover out of.
I started with the largest sections, leaving a good 1.5-2" of seam allowance. Slipcovers can develop stress points if they are too snug. I'd rather mine be nice and loose to give some slack than to be too tight and end up ripping. The nice thing about slipcovers is that they're meant to look casual, so consider this project very forgiving. If I did it again, I wouldn't worry so much.
So I basically made a whole slipcover with my sheet, cutting out the shapes and pinning them together and trimming excess until they fit nicely. Remember, plenty of slack!
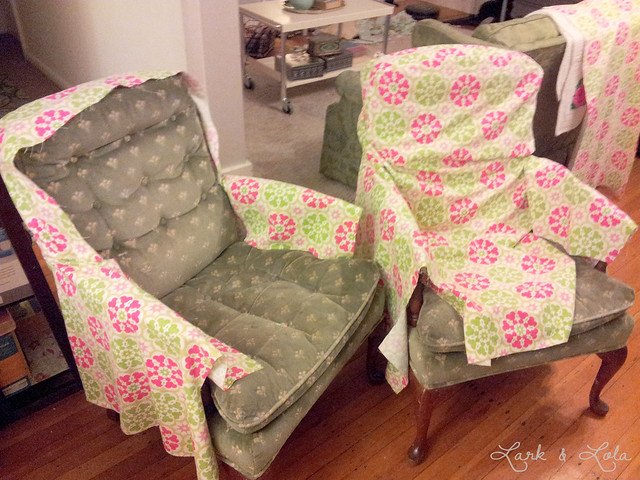
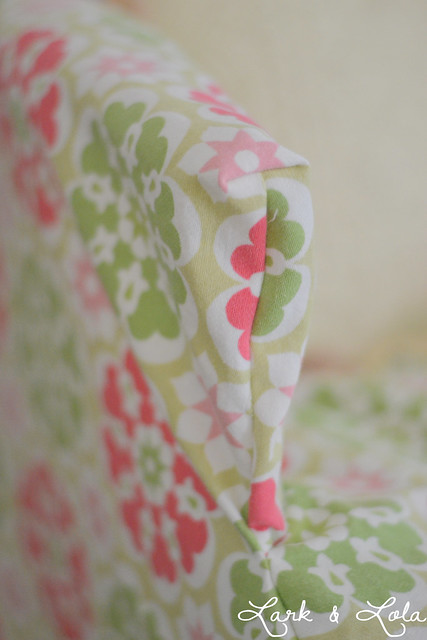
The arms were definitely the hardest part to work around. I found it helpful to start on the inside near the seat, and work my way pinning up and around to the bottom outside. This part took me a while, but I got it eventually. If your chair doesn't have arms--even better!
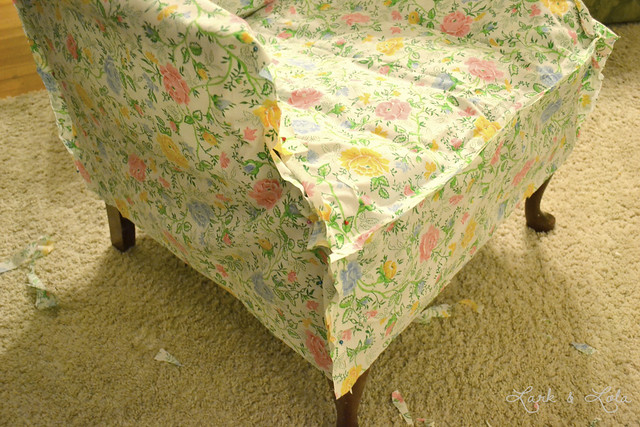
So hopefully that gives you a good idea of how I created my "pattern". See how I left plenty of room for the seam allowance? Actually, not really even seam allowance. I did my seams at 1/2" seam allowance. Point is--make your slipcover nice and roomy!
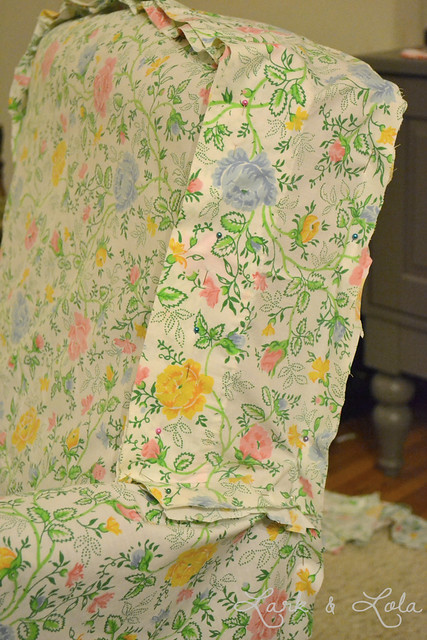
Once my chair was covered and I fussed over the trimming for a bit, I nervously unpinned all the pieces and pinned them to my fabric. I was making two, so I simply doubled up my 6 yards. Then I cut them out, really fearful at this point that I'd wasted a good $60.
Now was the moment of truth. I started with the back of the chair, and the arm pieces, since those parts were the fussiest, I wanted to work around them from the start. I found this to be helpful. It also helped to position them on the chair first to see exactly where to pin and sew each piece together. I was back and forth from the sewing machine to the chairs almost constantly, but it really helped me piece the whole slipcover together. Take your time, if you do this project.
I thought I'd be doing a lot of seam ripping, but I finished in a few hours (start to finish, the whole project) and only had to undo two seams. Not too bad.
So if you're sitting there wondering if you CAN, I say YES! I was delightfully shocked to discover my little project was turning out beautifully, and all without a pattern or tutorial to walk me through it.
Again, slipcovers are casual in style, they're very forgiving. They don't have to be perfect. Mine definitely aren't.
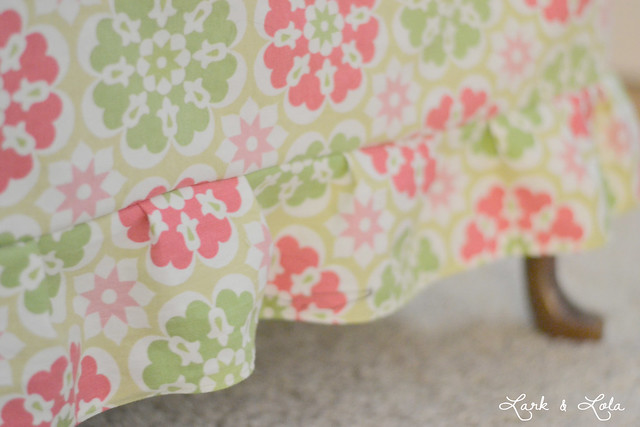
The arms on my chairs made me the most nervous, but it helped that the arms are very narrow, as you can see I simply connected the sides with a seam. Larger arm chairs would require a front-facing fabric piece like most couches have, but I'm sure I could have managed that if I had needed to.
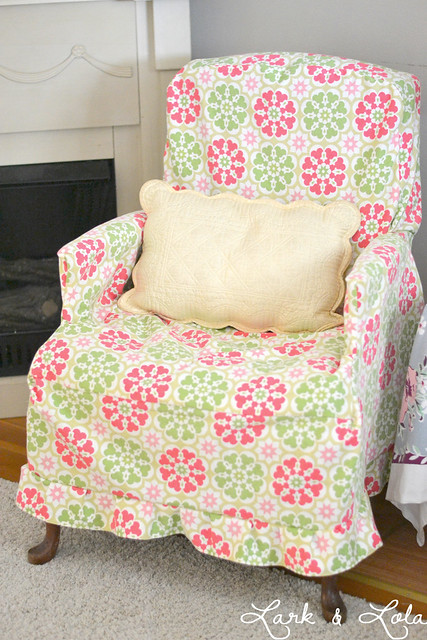
Along the bottom edge, I sewed on a very slightly ruffled edge. Turns out 6 yards (3 years each) of fabric strips still wasn't quite enough to do tons of ruffles around the edges, but I was able to get some small pleats in there so I'm still happy. If I could do it again, I'd allow 4 yards for the ruffles.
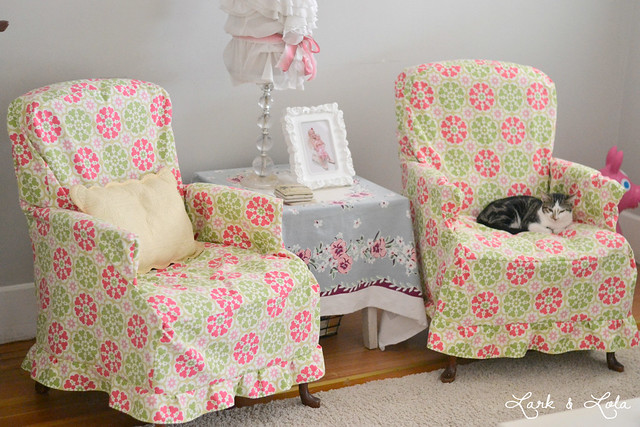
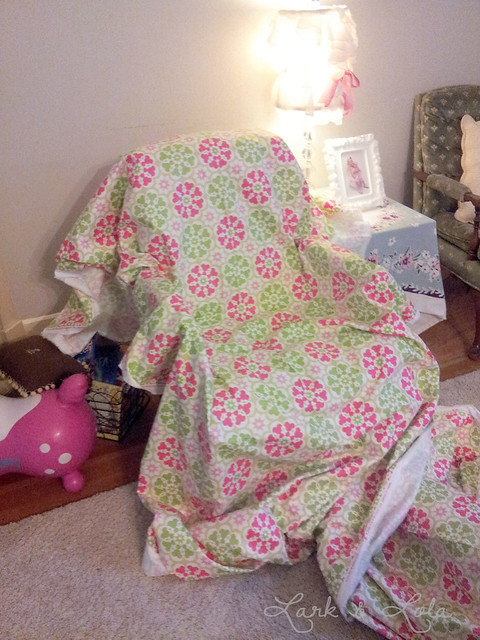
Stella likes the new slipcovers too, and it's especially nice with small children and pets to be able to remove and wash the slipcovers. I'm looking forward to that, after many tries with the upholstery cleaner. You just can't revive 40+ year old upholstery.
I chose a bright, cheery pattern and I love how they pop in my living room! It's like having new furniture for a fraction of the price of actual new furniture.
Now that I know I can do it, I might just make more so that I can change my look every once in a while.
If you're thinking about sewing slipcovers, but you're nervous, I say go for it! It ended up being a lot easier than I ever thought possible.
Thanks for visiting!
XO,
Heather


7 *´¯`* ℓσvεℓү cσммεηтs *´¯`*
Your plan to make your blog encouraging definitely worked for me. For example, I used to be deathly afraid of trying to make a vintage ornament wreath for fear of ruining precious Shiny Brite ornaments. But after reading a few blogs about it, I took the plunge and it turned out PERFECT! Two funny things I noticed in your photos....I have the exact same tablecloth that is in your first photo between the two chairs and I also have the exact same sheet that you used for your pattern! What a crazy, vintage world we live in.
ReplyDeleteHave a great day...
Erica
That's too funny Erica! We have similar taste, I guess. :) I haveo to admit, I wouldn't have minded a slipcover made out of the sheet either, once I saw it all put together.
DeleteGlad you're taking on some challenges! Are there photos of your wreath on your blog?
Thanks for the comment :)
We did take photos believe it or not. A lot of times, I forget!
Deletehttp://pyrexthriftersisters.blogspot.com/2012/12/wreath-making-with-two-sisters-maddie.html
http://pyrexthriftersisters.blogspot.com/2012/12/wreaths-round-two.html
You're so brave. Never in a million years could or would I do that. I'm totally impressed with your skills and your chairs look beautiful.
ReplyDeleteYou totally could! I was really intimidated, but now looking back it seemed easy to make. Do you sew, Lauren?
DeleteThanks for your kind comment!
I have that sheet you used for your pattern too!. I hope you kept it to salvage for at least one more project :)
ReplyDeleteNice work on the chairs. And the lack of seam ripping. Keep it up! What's next?
Wow! Popular sheet! I felt a little bad cutting it all up, but I thrifted it over a year ago and never did anything with it. Made a nice temporary slipcover though...
DeleteThanks Kellee! Next I'm sewing Union Jack pillows. Wish me luck.
Lark & Lola love hearing from you!